In November I had the pleasure of spending a day at the Silver Tree Steiner School, in Parkerville, working with 10 kids and their fathers/grandfathers/uncles. The project was to make a bookcase together, which the kids could feel proud of as a legacy they would leave the school. It was a great day.
The Brief.
The teacher, Yvette, wanted the 10 boys of her class to "create a bookshelf... for our classroom, so they can see their contribution everyday... measuring 1900H X 920W X 330D (6'3" high x 3' wide x 13" deep) and ... to make something together that they can give to the school ... as a reminder to future Silver Tree School children of those who went before them... It was to be made from recycled timber, as a matter of principle, and another very essential ingredient would be the participation of fathers/uncles/grandfathers in the activity with the kids. Doing it together as a shared experience was to be one of the key elements of the day.
Based on our discussion, I drew up the following plan:
My role would be to supply the tuition, equipment and materials, and to facilitate the day.
The Preparation.
My tasks included creating the material for the bookcase sides and shelves. It all starts with a packing crate or two...
 |
| My trusty Disston panel saw gives a clue to the size of this crate floor. |
 |
| The sides of another packing crate, cut down to bring home. Now to pull it all apart.... |
There is as fair bit of work to carefully pull apart a crate and denail the material. I then square dressed it to to slightly oversize, about 22mm thick. It all takes time and effort - and a bit of know-how!
 |
| The ISPM 15 Mark on the undressed piece in the foreground says this packaging was Heat Treated in the UK (GB). |
However, the net result is a stack of very nice "Northern Hemispherical Softwood" awaiting recycling/upcycling into a nice piece of furniture by an enthusiastic bunch of people! There is one more step though - with just one day to make the bookcase together, I would need to glue up the material for the sides and the shelves prior to the day.
 |
| Table Saw cuts make the grooves to house the plywood splines. |
The aim was to create sections which were 350mm (14") wide. Rather than use just butt joints to glue together the sticks in order to create this width, I opted to use full length plywood splines. As well as offering greater strength by more than doubling the gluing area, this method also provides accurate registration of the components during the glueup.
 |
| One of the shelves glued and cramped up. |
In this way the material for the two sides and seven shelves were glued up, overlong and overwidth. The group would do the final dimensioning.
 |
| End view of a splined joint still drying under cramps. Nice. |
Once the cramps were off, the glued up sections were put through the thicknesser and taken down to 21mm. This is the easiest way to clean up the material whilst also removing any anomalies in registration, etc. I then shot the front edge (face edge) over the buzzer. They were now ready to go.
The back of the bookcase would be panelled with Vee-Joint Lining Board. The material for this came from more packaging, which I square dressed to 75mm x 12mm (3" x1/2"). We would be shooting the tongues and grooves by hand on the day. I machined up a few other sticks for the pediment and toe rail, and the preparation was done... other than loading up the ute and trailer on the day.
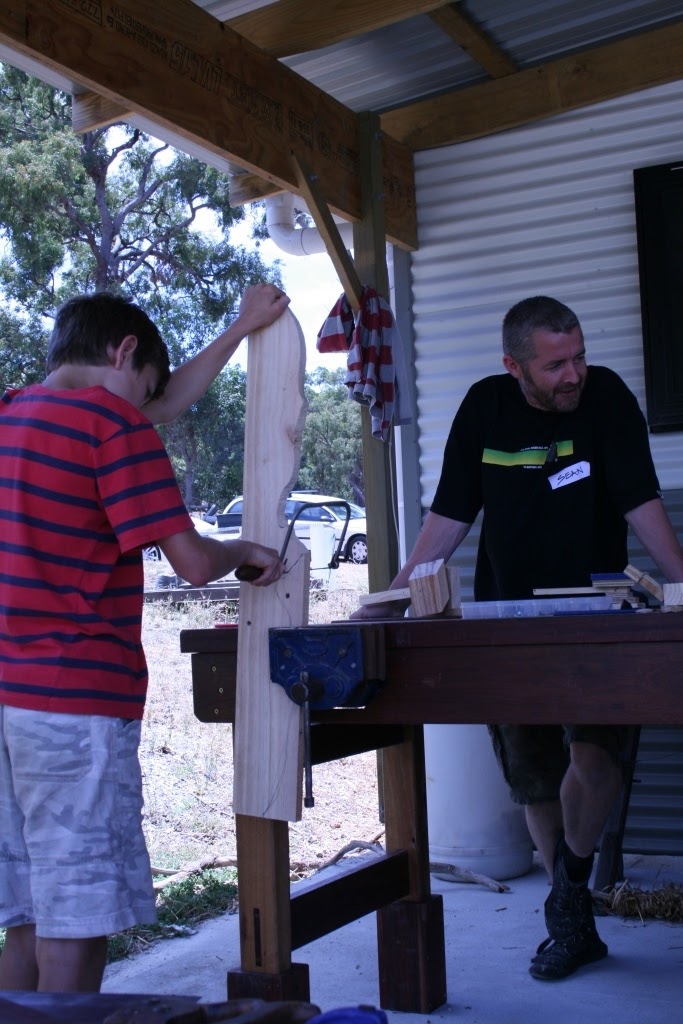
Getting warmed up with a bit of Free Creative Play.
I always like to start these activities with a bit of what I call "free creative play". There's hammers and nails, saws and a pile of wood pieces, and kids get to make what they want - after I have done a bit of front-loading about tool use. How to hold and use the hammers, nail selection, how to use the tenon saws and how to secure the wood for cutting, etc. All this is beneficial for both kids and the adults, and gives people a chance to get warmed up to the tool use. After about 45 minutes, it was time to get serious about our project...
 |
| Free creative play offers a good chance to get the sawing techniques honed. |
Many tasks, many people, One Project.
With 20 people present, the important thing was to make sure all the different aspects of the job would be done so that it would all come together for the assembly within the time available.
These tasks included:
- Ripping the shelves and backs to width,
- Cutting the shelves and sides to length and square.
- Rebating the back edge of the sides, to house the lining board backing.
- Cutting the pediment board to shape and length.
- Cutting the housings for the shelves into the sides.
- Shooting the tongues and grooves on the lining boards with moulding planes.
- Give a quick hand sand to the components.
Once this work was done, the next tasks would be to:
- Glue and cramp up the shelves into their housings in the cabinet sides.
- Fix the toe rail and pediment board
- Fix the lining board into the back of the cabinet.
- Stand back and admire our masterpiece!
Here is the story of it's construction told in pictures:
 |
| Young and old alike got stuck in. Here ripping the shelves to width. |
 |
| Cutting tongues in the lining board with a moulding (match) plane. |
 |
| Docking the shelves to length. |
 |
| It was a hive of activity. |
 |
| Making the saw cuts for the through housings for the shelves, across the sides. |
 |
| Removing the waste from the housings defined by the saw cuts, with a chisel. |
 |
| Cleaning out the housings with a No71 Router plane. |
 |
| So much to share and learn together. Cutting the grooves with a plough plane. |
 |
| It's not all fun - hand sanding the lining boards prior to fitting. |
 |
| Such a great chance to learn some new skills! |
 |
| One of the kids designed and shaped the pediment board. |
 |
| All hands to the glueup. Cramping up the cabinet. |
 |
| Nailing the shelves to the sides while under cramps. |
 |
| Hammers galore as we nail it together. |
 |
| Fixing down the lining board on the back. A great team effort. |
Job successfully completed.
So that's the story of the Silver Tree Bookcase. Not a power tool in sight on the day, all done with our own sweat and effort, a great chance to create something by hand using traditional hand skills.
 |
| Most of the gang around our completed bookcase. It was a great day. |
It was a long day for the kids, but they did pretty well. The whole idea was that the kids could create something they could feel proud of, and leave behind at the school as a legacy of their time there. Having kids together with some significant men in their lives, Dads/Uncles/Grandads, was an important part of the whole idea, so that it was a shared experience too. It was delightful seeing through the day the way kids and adults were mentored, encouraged, and taught new skills.
I'd like to extend special thinks to all involved - to the kids and adults for their enthusiastic participation, even when it was hard work (they shot a lot of tongues and grooves on those lining boards!), to the adults with trade skills who helped provide some leadership and great mentoring on the day, and to Yvette the teacher (who was not with us on the day) for having such a great vision behind the activity. The
Silver Tree Steiner School is such a wonderful school community.
 |
| Me with most of the primary beneficiaries.... the kids. |
All the kids and adults involved on the day can feel very proud of the job they did. Once again, it was a pleasure to recycle/upcycle some packaging material, which was previously destined for the waste stream, into a nice piece of furniture which will last indefinitely. We need more of it!
It was a great effort, a wonderful shared experience, which left many different positive legacies...
.jpg)