With all the treads and risers complete, including the
First Two Curving Treads, the next stage was to make and fit the handrail up the stairs. When there are winding treads, it is normal to have the handrail just going up the outside wall, where the treads are at their widest.
Creating the handrail profile.
In an earlier post I mentioned that my customer had found a handrail profile she liked on a US website. With some experimentation, I found I could get close starting with 60mm x 60mm material, and using my table saw to cut two rebates and then use three different router cutters to create the profile.
 |
The picture from the US website, and my profile process.
One correction: Step 3 is actually a 22mm radius, not 19mm. |
I need to start with sections of 60 x 60 material - jarrah. You can't just pop in to the hardware shop and buy this stuff! The timber merchants don't carry this stuff anymore. It would have to be created. Almost the only way to find heavy sections of jarrah is through salvage. Specifically old bearers. These 4" x 3"
timbers sit across the stumps and support the floor joists. While they were green when the house from which they came was built, they supported the floor (and the walls in a timber framed house) for that 50-100 years before the house was demolished. In that time the bearers have seasoned beautifully.
The sections of handrail I created started out as bearers - 4" x 3" timbers. The longest piece, at 3.6m (12 ') long, actually came out of the old part of my customer's house, where it had been for nearly 80 years. So nice to put it back into its renovated original home now as part of the handrail!
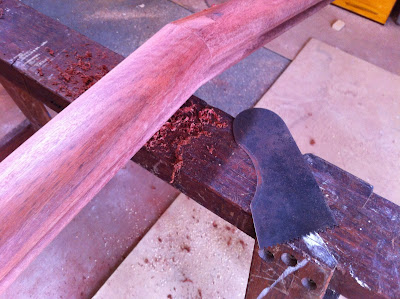
Step 1. Machine the 4" x 3" material into 60 x 60mm straight sticks, the required lengths.
Step 2. Cut the 25mm x 6mm rebates along each side of the base of the sticks, on the table saw.
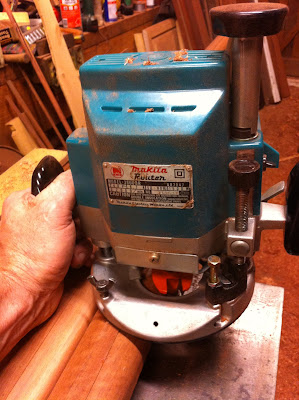
Step 3. Create the bottom beads by running the router cutter in the rebates.
 |
| The router runs along the rebate, from below, to create the lower bead. |
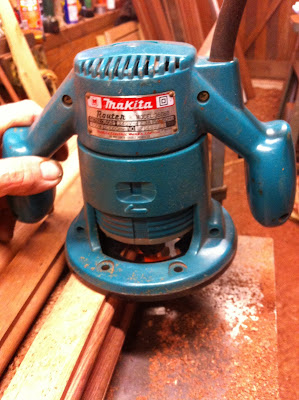
Step 4. Create the top big round-overs with a 22mm radius rounding-over router bit.
 |
| Creating the top round-over with the big 22mm radius bit. |
Step 5. Create the small round-overs under the top, using a 6mm radius rounding-over router bit.
 |
| This one's tricky, a long reach. Rounding over the underside of the "breadloaf top". |
That's it! Profile created. Note: The secret is to have three different routers will the cutters set up in them, undisturbed until all handrails and balustrading is completed!
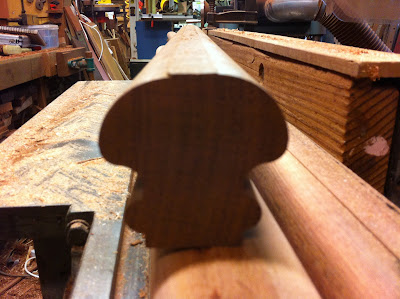 |
| Not a clear pic... but you get the idea. Notice the two tiny quirks on top? |
Planning for the joints.
The normal height for a handrail is the same as that of balustrading. Under the Building Code of Australia, baustrading must be a minimum of 1000mm high. With balustrading on a flight, the top must be a minimum of 865mm when measured at the point directly above the nose of the tread below. While this does not really apply here, it was a good starting point to draw this line 865mm above and parallel to the nose line below - which is about at an angle of 34 degrees. Of course, where there are winders this idea all turns to mud as the angles change from nose to nose around the corners. So then we experimented, to find the best angles around the corners, and the best transition points for where these might meet the ones on the straight flights. After many lines were drawn on the wall, we then decided on the best line to follow.
 |
| Hand rail pillars fitted to the back wall on the agreed line. |
The hand rail pillar positions were worked out, and then fixed to the wall. The joint angles and positions were now determined.
 |
| One joint, drawn on the wall. Now for the bridle joints... |
Cutting the joints and putting the rail sections together.
The interesting thing about these bridle joints is that they were different, depending on whether the tenon would protrude from the top of the adjoining piece or disappear into the adjoining piece.
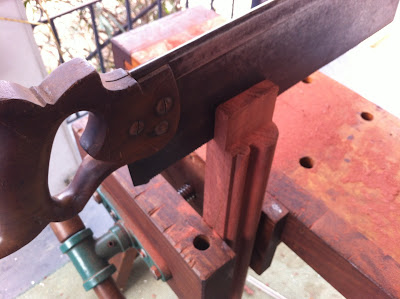 |
| Cutting the tenon on a bridle joint. |
Remember the two tiny quirks along the top of the handrail? These were there to aid the accurate marking out and cutting of the joints, and were used to aid the accurate sawing of the joints. It worked a treat... otherwise it would have been very difficult to have done the accurate marking out for the joints.
 |
| Nice tenon! ...For where the tenon disappears into the adjoining piece. |
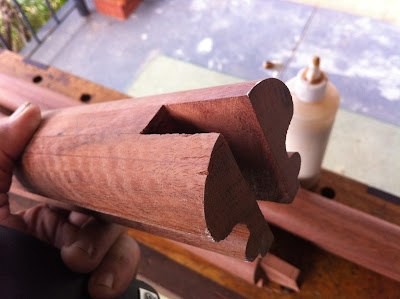 |
| Nice open mortise! ...for where the tenon will protrude from the adjoining piece. |
 |
| The three pieces from the back wall, with joints cut ready to glue up. |
So how do you do accurate cutting of joints like this on site? It was made so easy by using my trusty "
Saw Horse on Steroids", which was so useful for building the winders on site. You can't do this kind of stuff easily or accurately with power tools. It's hand tool territory! The holding power and options of this bench are wonderful for this work.
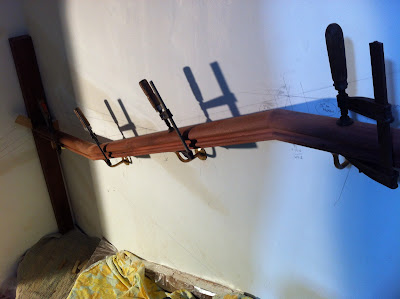 |
| Joints pulled up, rail in position on the back wall, and glue drying. Looking good! |
 |
| The top joint on the back wall. Protruding tenon has been cleaned off. |
 |
Glue dry, so time to clean it up.
Those tiny quirks are now removed with a curved scraper and then hand sanded smooth . |
 |
| The curved scraper does a great job. Made from a recycled saw blade. |
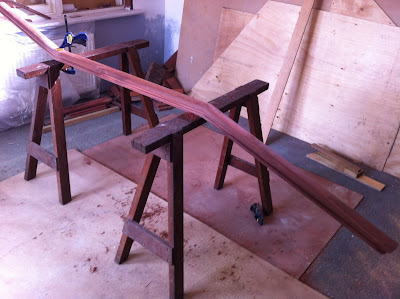
 |
| The long run being cleaned up. It's over 14 feet long! |
 |
| The long run cleaned up and in place. |
There was much deliberation about the two corners. With the rails meeting at complex angles, it was not going to be possible to have a clean joint on the corners. Hence the gap between.
 |
| Where the long run meets the back wall. A 25mm gap to remove any finger trap. |
 |
| Where the back wall rail meets the lower section. Another 25mm gap. |
Other than the polishing of the handrails, there is one handrail task left (other than the balustrading upstairs). See that bottom end in the pic above? I have still to make the finish... the handrail is to curve and and down, mirroring the curve of Tread #2 below it and dropping the equivalent of one rise. A spiral finish. Eehah! that one will be a challenge! That will happen sometime in the future.
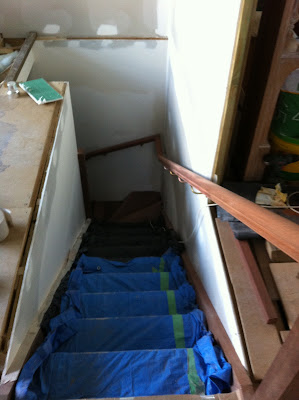
After the handrails were completed, the trim along the walls around the winders were added. The staircase is getting closer to being finished.
To complete the staircase, the remaining tasks need to be done: the spiral finish at the bottom of the hand railing; the balustrading on the top floor; the making of the door into the "hidey hole" underneath the lower sections; and the polishing of the entire staircase.
What a great project. A pleasure and a privilege to make, too.
.jpg)